Do you want to sense some sound in the environment? You have come to the right place! These instructions will help you to do that.
Components
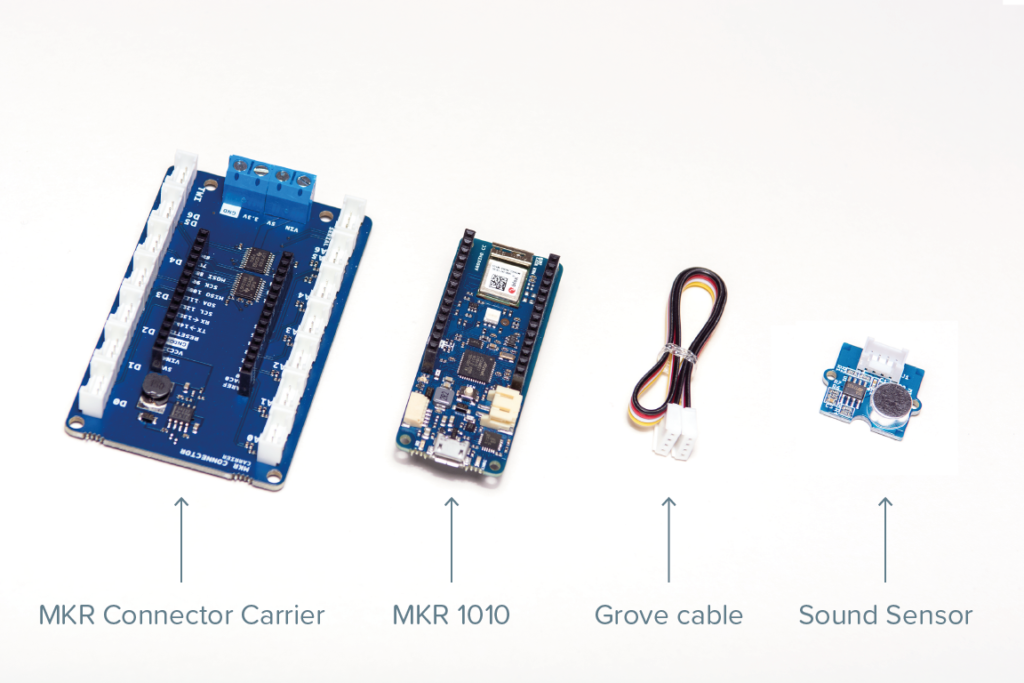
- A microcontroller (the brain of your project)
- A sound sensor
- A cloud service (where you store the data)
Extra:
We recommend to use the Grove System to connect the components, as it avoids the need of soldering. Therefore, you will need the following extra component:
- A Grove Connector (used to connect sensors and microcontrollers without soldering)
Microcontroller
There are a significant number of microcontrollers in the market. We consider that the Arduino ecosystem is the simplest and approachable for non-experts.
For connected project, we recommend to start with the Arduino MKR WiFi 1010. It is the easiest point of entry to basic IoT projects.
Arduino microcontrollers are simple to program. The simplest way of doing it is by using the Arduino Web Editor.
Sound sensor
We recommend to use the Grove – Sound Sensor manufactured by SeeedStudio. An illustrative image in the back of the card that you have selected shows how it looks like.
Sound sensors detect sound in the environment. Their main component is a simple microphone. They are easy to use and they can be used to detect whether there is sound in the environment. But they are not recommended to be used as a recording device.
Cloud service
We recommend to use the Arduino IoT Cloud. It is simple to setup and you don’t have to pay – or put down a credit card – to start using it.
Grove Connector
To connect an Arduino MKR device with sensors and actuators using the Grove System, requires an Arduino MKR Connector Carrier.
Getting started
To make a functional prototype means not only to have the components – which by now we imagine you already have procured – but also to know what to do with them. If this is your first project, we recommend to start by getting familiar with the basics before moving forward and making your project.
Basic tutorials
Once you had done these two basic tutorials, you can move on and start sensing sound.
Plugging the components
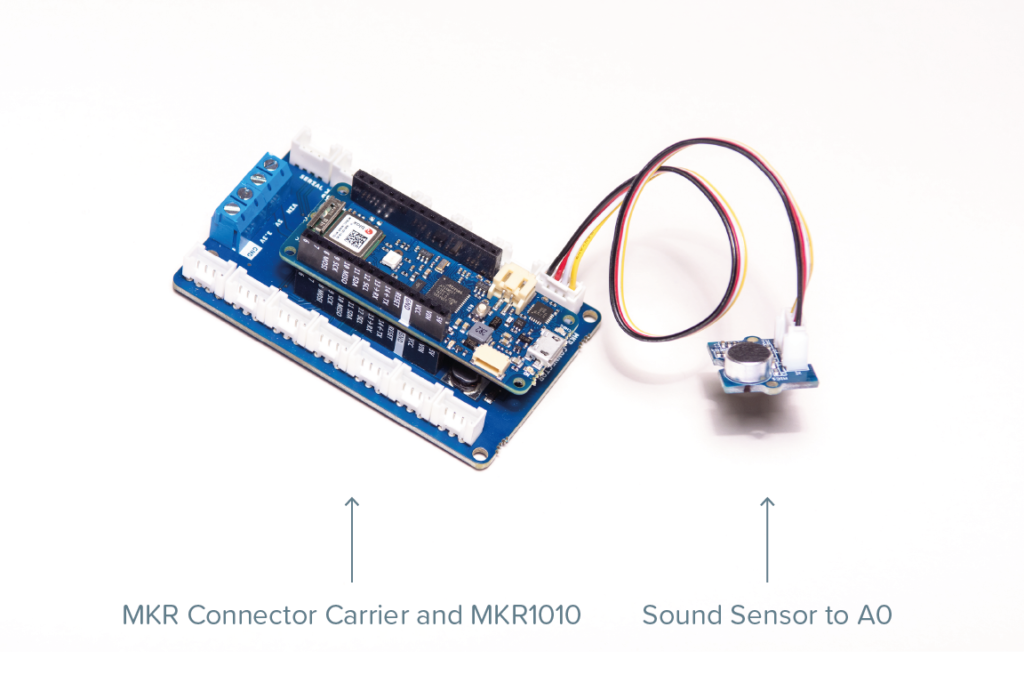
By plugging the sensor and the microcontroller to the Grove Connector, you are creating a circuit.
Coding
To start sensing sound, you will have to add some code to the micro controller. While creating the circuit you have connected the Grove-Sound Sensor to port A0 of Grove-Base Shield. You can start by using the following code:
// test code for Grove - Sound Sensor
// loovee @ 2016-8-30

const int pinAdc = A0;

void setup()
{
    Serial.begin(115200);
    //Serial.println("Grove - Sound Sensor Test...");
}

void loop()
{
    long sum = 0;
    for(int i=0; i<32; i++)
    {
        sum += analogRead(pinAdc);
    }

    sum >>= 5;

    Serial.println(sum);
    delay(10);
}
Once you have tested that the sensor is working, you will like to move on and store some data in the Arduino IoT Cloud.