Checkbox 1
The board can run a modified program
To keep verifying the functionality of the microcontroller, it is suggested to test that it can run a modified piece of software.
Using the previous card – Microcontroller | 1 – you have verified that a program can be uploaded to the board: Blink.
Now is time to check that a modified example can be also used and presents the expected results.
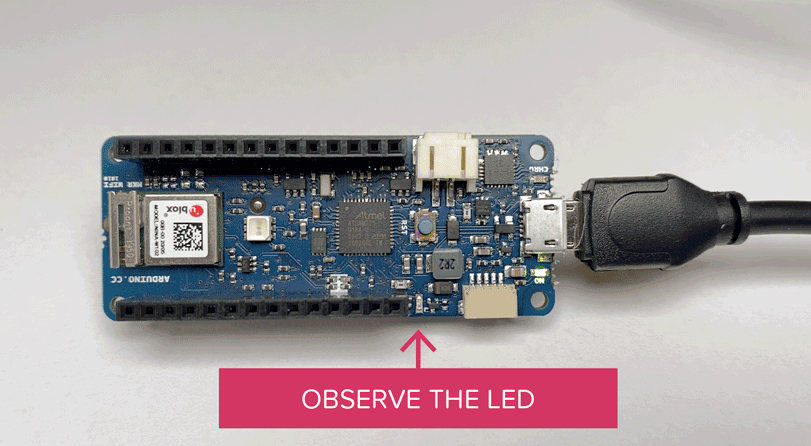
The Blink example does the simplest thing you can do with an Arduino board to see physical output: to blink the on-board LED.
We suggest now to modify that code, to produce a different result. The code below shows the loop function in the Blink example. The 1000 milliseconds delay indicates the frequency of the blink: 1 second on, 1 second off.
// the loop function runs over and over again forever
void loop() {
  digitalWrite(LED_BUILTIN, HIGH);   // turn the LED on (HIGH is the voltage level)
  delay(1000);                       // wait for a second
  digitalWrite(LED_BUILTIN, LOW);    // turn the LED off by making the voltage LOW
  delay(1000);                       // wait for a second
}
Make the LED to blink faster
We will guide you to make the LED blinking faster by decreasing the delay time from 1000 to 300.
Using a web browser, go to the Arduino IoT Cloud Web Editor.
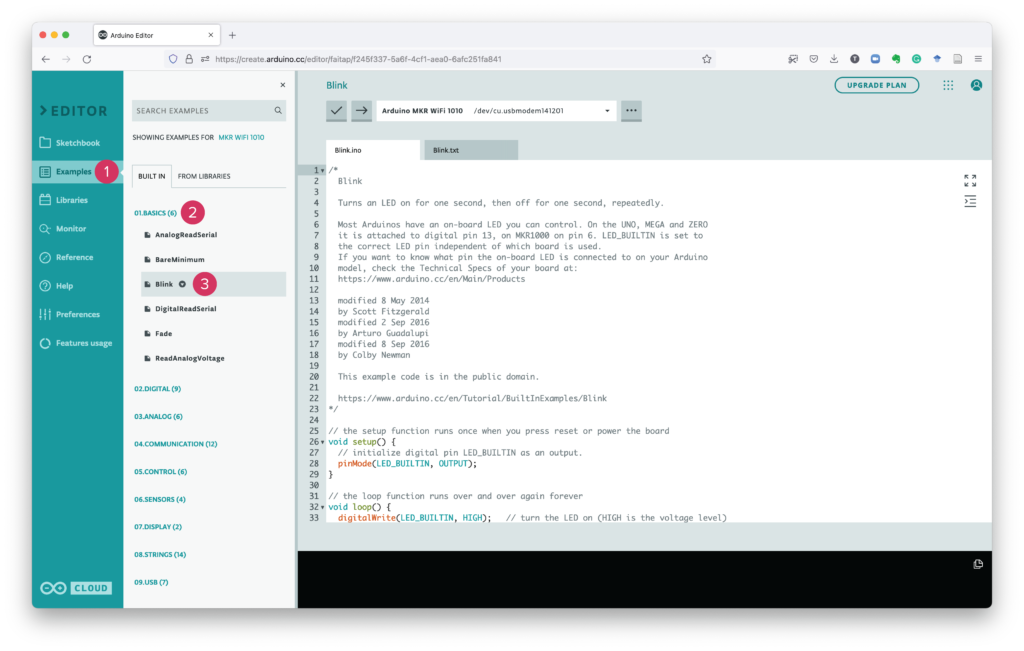
Navigate through the system to load the Blink example. See the image below to have a visual reference.
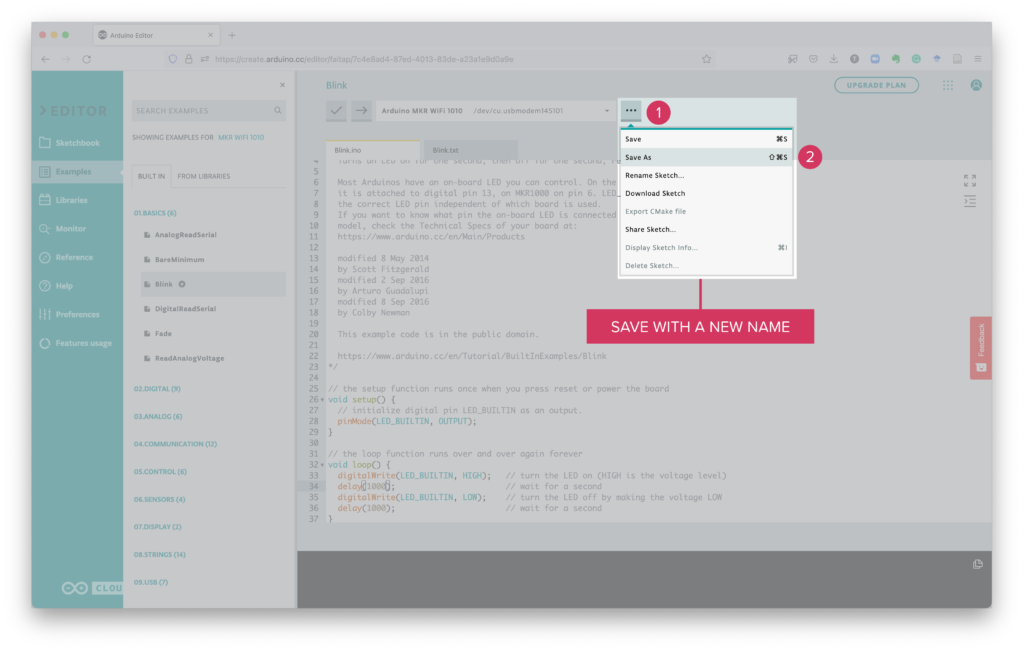
Save the code under a new name, to avoid overwriting the example.
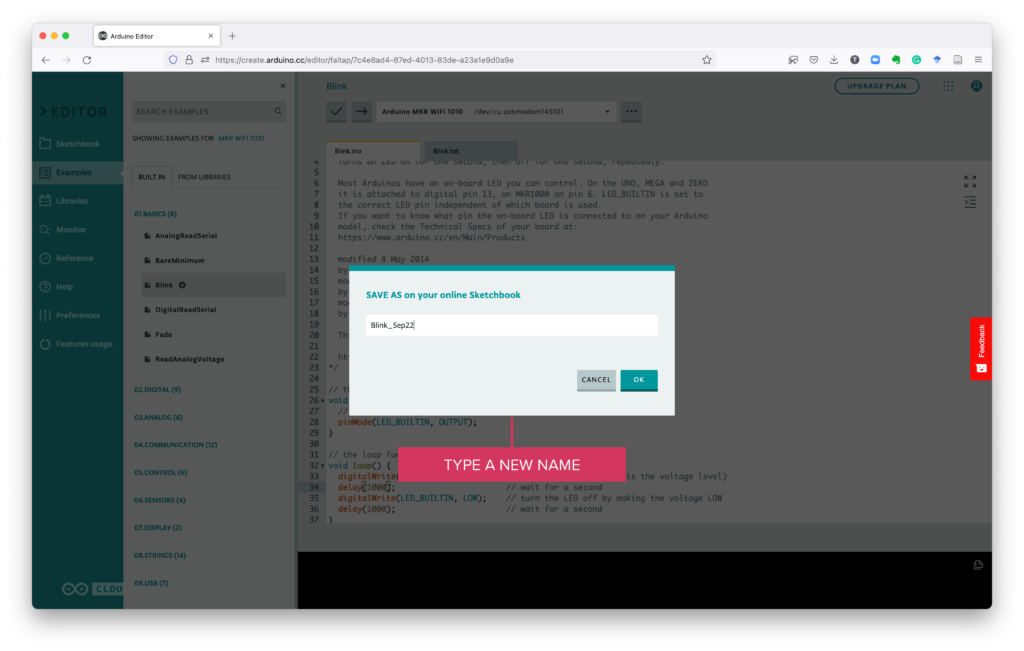
Type the new name for the sketch and click OK to accept it.
Modify the example to test different code and how the microcontroller responds to the changes.
Identify the lines where the delay function is called:
// the loop function runs over and over again forever
void loop() {
  digitalWrite(LED_BUILTIN, HIGH);   // turn the LED on (HIGH is the voltage level)
  delay(1000);                       // wait for a second
  digitalWrite(LED_BUILTIN, LOW);    // turn the LED off by making the voltage LOW
  delay(1000);                       // wait for a second
}
Modify them to a different time:
// the loop function runs over and over again forever
void loop() {
digitalWrite(LED_BUILTIN, HIGH); // turn the LED on (HIGH is the voltage level)
delay(300); // wait less than a second
digitalWrite(LED_BUILTIN, LOW); // turn the LED off by making the voltage LOW
delay(300); // wait less than a second
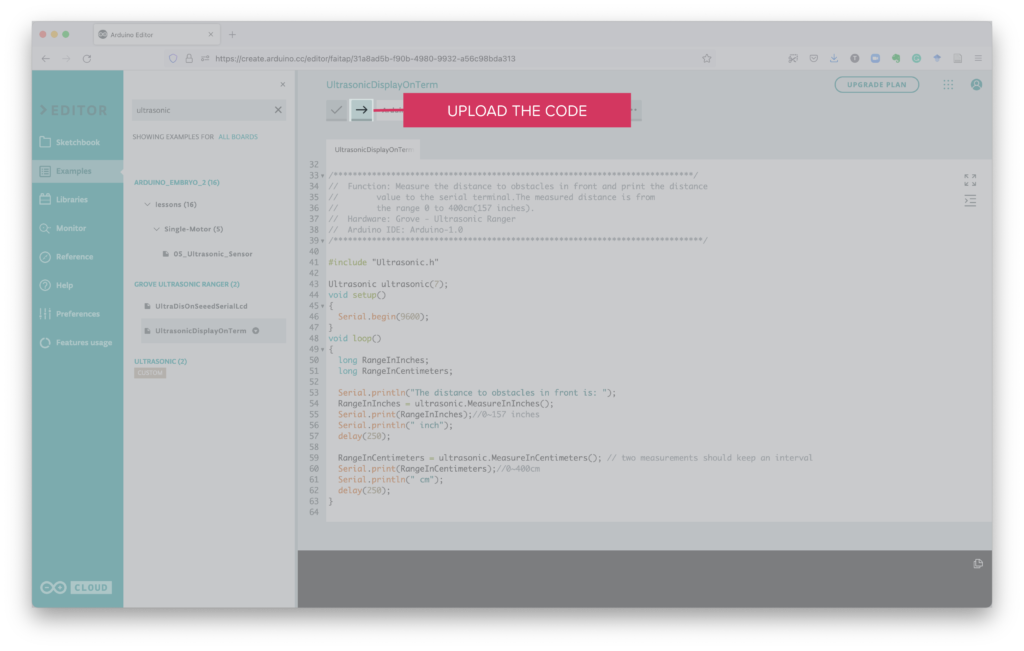
}After making the modifications on the code, remember to check that the board is recognised by the Arduino editor and upload it to the microcontroller.
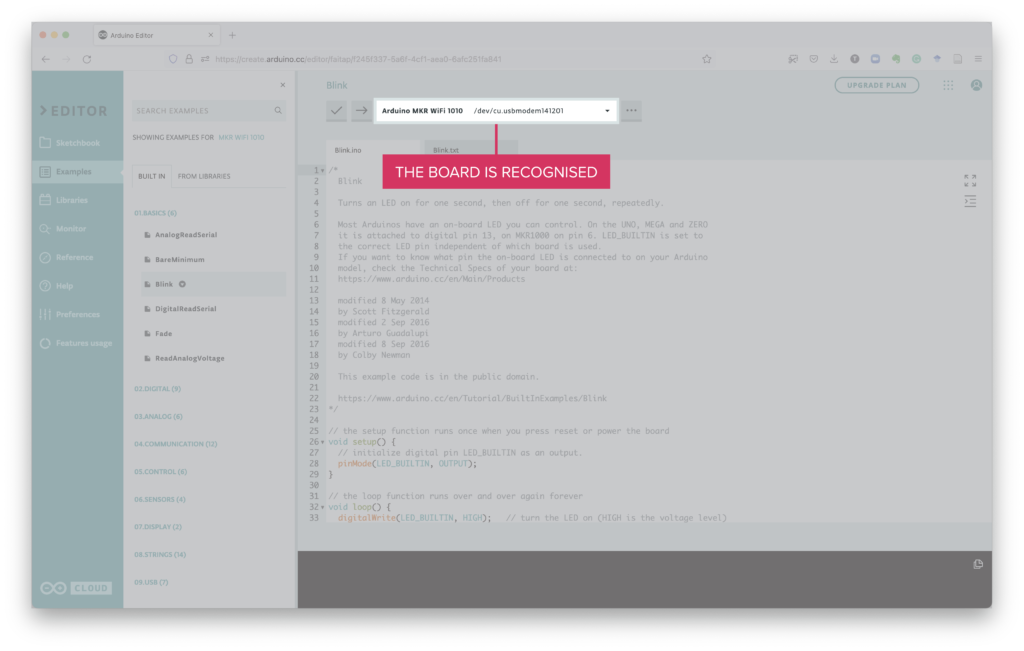
Upload the modified code.
The editor should give you a Success message.
Success. Saved on your online Sketchbook and done uploading […]And the board should start blinking the LED at a faster pace.