Checkbox 2
The board is getting power
Once the microcontroller is isolated from any other component, connect it to power using its USB connector.
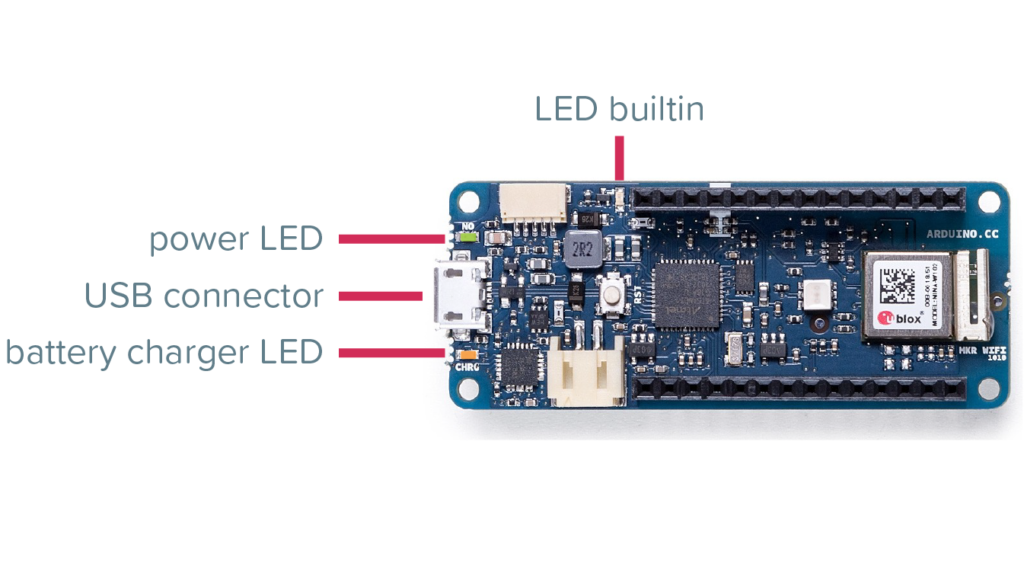
Connecting the microcontroller to a power source should generate visual responses on the on-board LEDs:
- The power LED should show a solid green light
- The battery charger LED should blink rapidly for a few seconds in amber and then turn off
- Depending on the software that it is running on the board, the LED builtin could be on or blinking

Unplugging and replugging the microcontroller to power should always present the same behaviour, visible through the feedback provided by the on-board LEDs. Unplug and replug the microcontroller from the power source a few times to verify it.
If the board is presenting the above described behaviour, move forward to the next step and run a basic program.