Checkbox 3
The sensor generates data
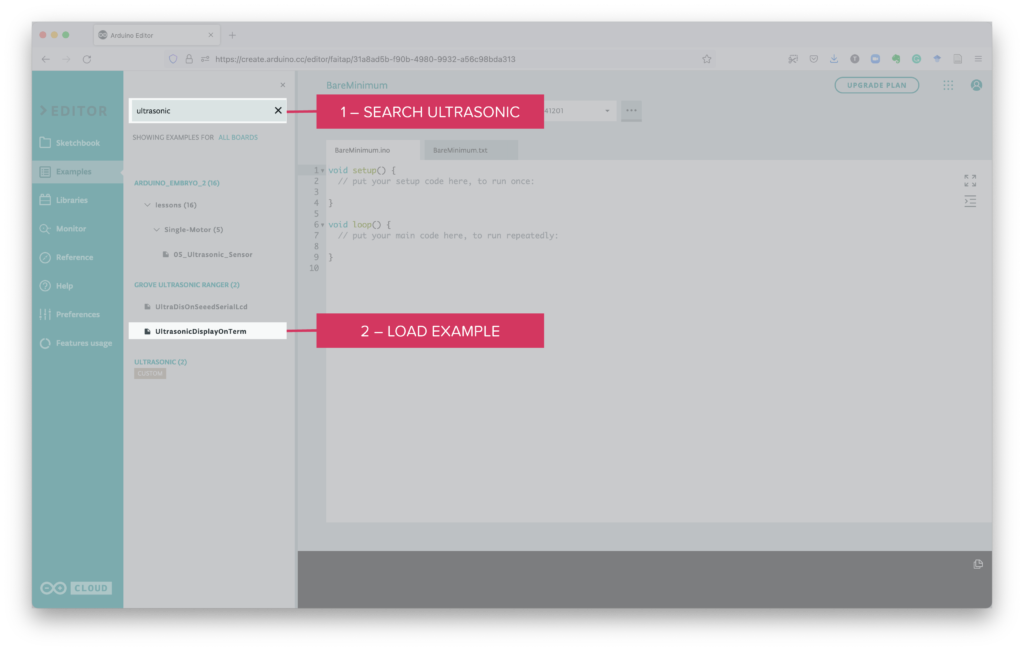
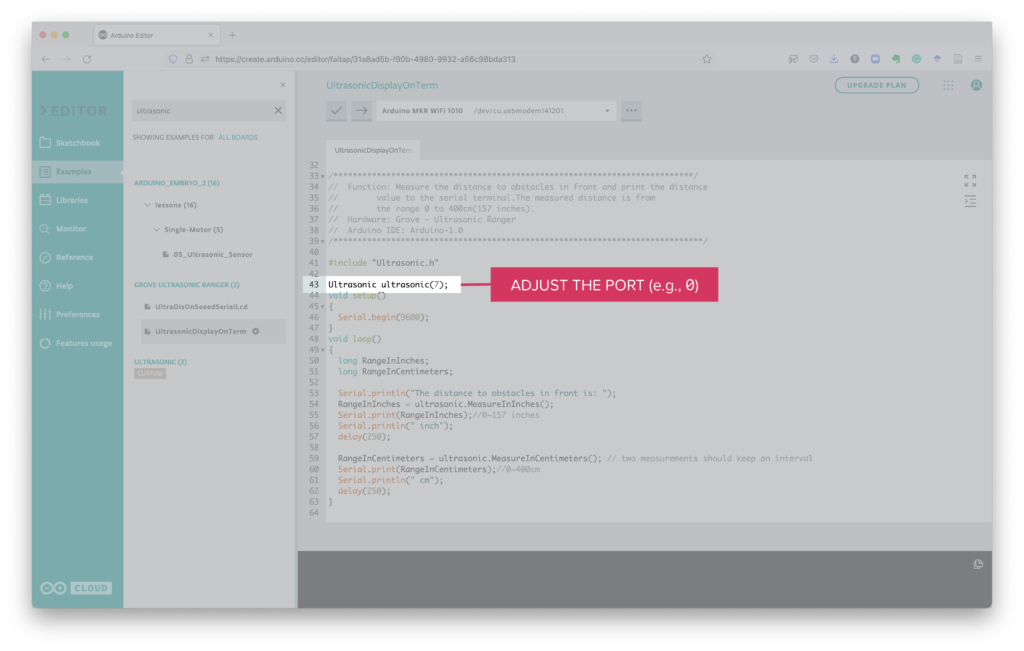
To test that the sensor does not present any malfunction, it is recommended to test it with a basic piece of code. In this case, it is the basic code the comes from its manufacturer.
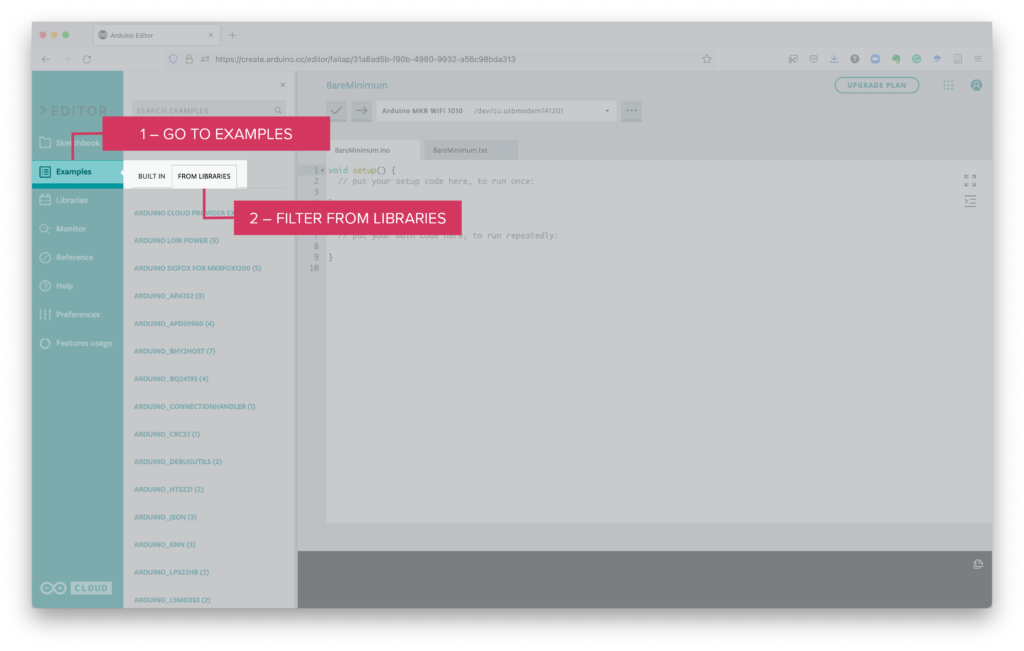
Using a web browser, go to the Arduino IoT Cloud Web Editor. Once there, follow the steps in the following screen captures.
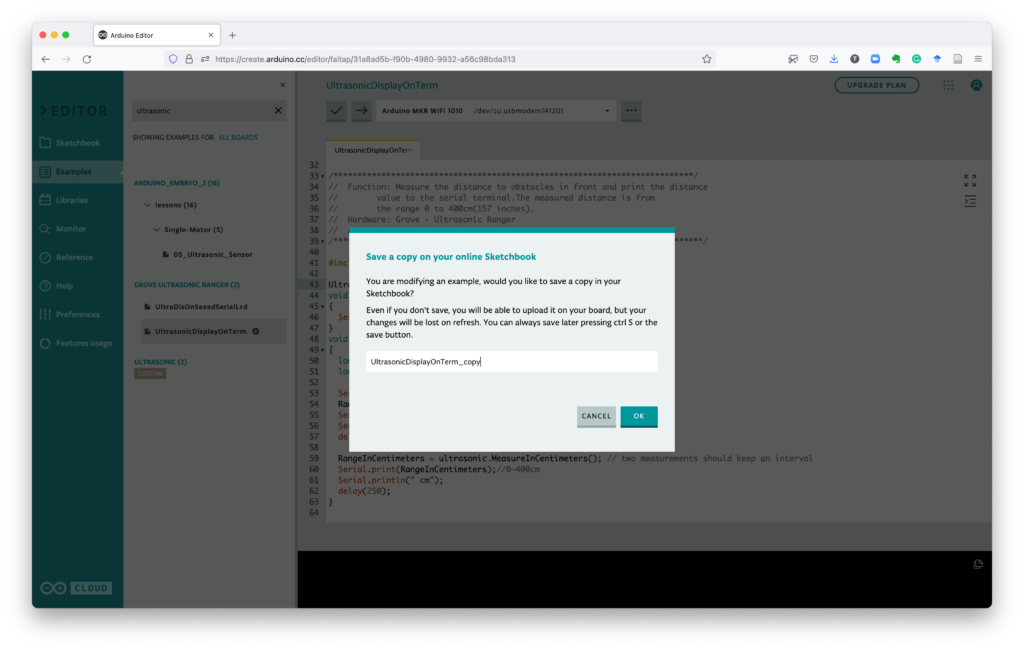
Once you have loaded the example, save it with a new name, as you will be modifying it.
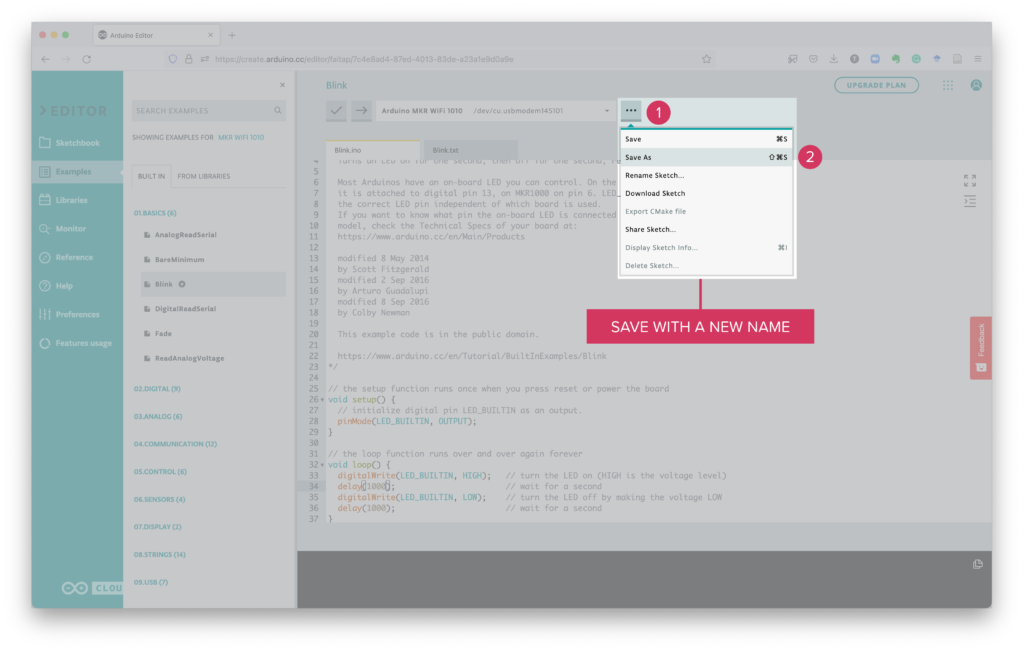
Type the new name for the sketch and click OK to accept it.
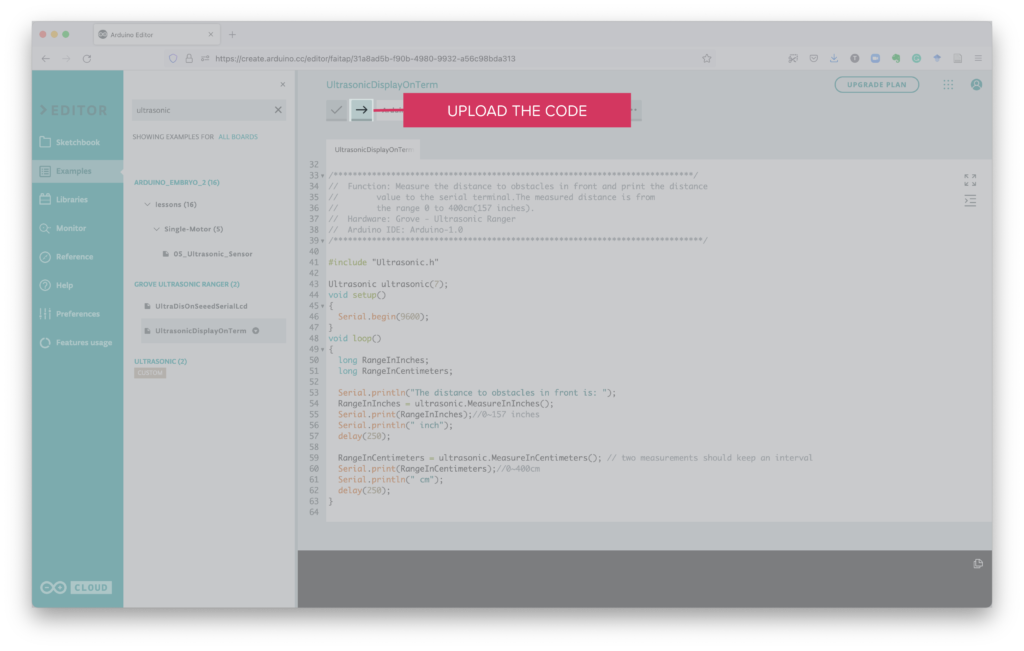
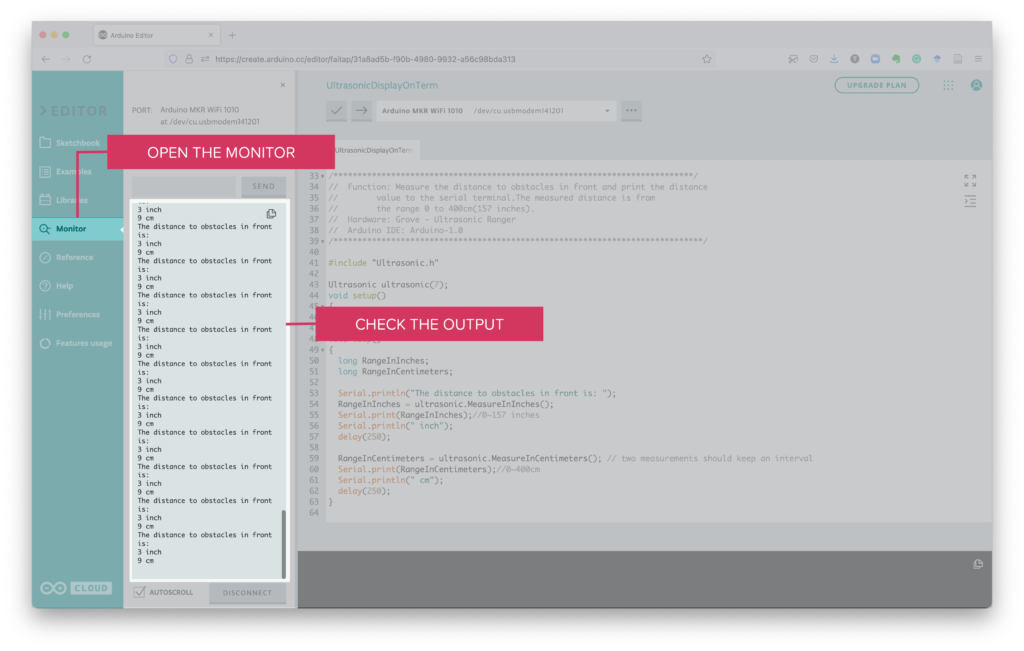
Success. Saved on your online Sketchbook and done uploading […]After uploading the code to the microcontroller, open the Monitor to check the output.